Pages

My Crappy Calendar for 2013

 
You know those big wall calendars?  Well, I don't  hang mine but I use it for everything.  My husbands work schedule, kids' volunteer schedule, appointments, outings, everything.  I usually end up get one earlier in the year when they are  expensive. I hate spending like $16.99 for a stupid calendar.  My kids want me to get the cool ones with Angry Birds or Star Wars or something like that.  Too expensive. I will get the free ones from Betty Crocker or something but I like these because they are stiffer and easier for me to use at my desk. 
 
Well, this year I got mine later than usual.  I had post it notes all over my desk with information about January.  So it was time to get a calendar.  We went to Menards and the had some calendars for $4.99.  Cheap enough for me. I was sold.


I had the choice of horses, landscapes and outhouses.  My daughter, the horse lover of the family got the horse calendar.  I'm not really into horses.  I think my last calendar was some sort of landscapes.  I don't look at the pictures so I don't really know. Or care. 
 
Outhouses.  Seriously?  Somebody made a calendar featuring outhouses?  Tee-hee. This was perfect.  Clearly I'm not the only one with a warped sense of humor and would totally not be embarrassed to have outhouse pictures at her desk every month.  I thought it was hilarious.  My family shook their head at me but I was totally getting the outhouses. 

 
I found some of the pictures hilariously interesting. 
 
Mays featured outhouse is brick and appears to be cemented into the ground. One of the doors is missing, revealing an extremely grungy looking toilet.  In the background appears to be a desert? At first I though it was water but it looks dry and flat. So glad that if someone is walking along the desert that there is some place to relieve themselves.  If they dare go inside.
 
Octobers outhouse is nestled in amongst some beautiful wildflowers near a lake. This would of course be the picnic spot I would pick.  Closest to the outhouse of course. 
 
Decembers outhouse is perched right in the middle of a forest.  I'm picturing wandering or lost travelers trying to find their way and finding relief at the outhouse they find in the middle of the forest.  My kids think that this looks like Shreks outhouse. 
 
When I first saw this calendar, I thought, "Who would take pictures of outhouses?"  Then I thought, "What's more strange?  Someone taking pictures of outhouses or the person taking pictures OF pictures of outhouses?"  Hmmm...


There was a joke floating around facebook around the holidays.  It showed a picture of Santa and his reindeer parked on top of an outhouse.  Santa was yelling at the reindeer saying, "I told you to go to the SCHMIDT house!!!"  
 
Tee-hee.


reade more... Résuméabuiyad

It's a baby thing ❤

A Conchinha adora ursinhos - coisa a que a irmã nunca deu muita atenção... Não sai de casa sem a sua Ursinha Bonny (o nome que deu ao boneco que lhe oferecemos no Natal) ou com algum dos seus peluches...

Aqui mostro-vos algumas fotos do quarto delas, da almofada maravilhosa da Rosehip, a manta antiga com as rosáceas em crochet (feita pela minha avó), do saquinho da Concha com tecido da Liberty e um dos brinquedos que recebeu no Natal, o servicinho de chá...


Conchinha loves teddy bears and she doesn't leave home without one - something that her sister never cared for. She calls this crochet bear that we gave her for Christmas Bonny bear... :)

Here are some photos of their bedroom, the Liberty fabric bag where she carries her stuff, the tea service she received this Christmas and the pillowcase by Rosehip, on top of the old crochet blanket that my grandmother made...
reade more... Résuméabuiyad

Sweet & Sour Chicken

 
I've found my favorite sweet and sour chicken!  I've tried several kinds with different sauces but this one wins.  Yea, it's kinda a pain to bread it, fry it and then bake it but it's totally worth it.
 
I made a double batch.  This makes a lot. I wanted leftovers. I also made a lot of sauce. I like sauce. I like to add it to my rice and broccoli. So feel free to halve the recipe below if you don't need this much food. 


I used splenda instead of sugar.  This sauce uses a lot of sugar. I like sweet sauces. We have it here in bulk and I've found that it tastes fine in dishes like this. You can use sugar, it's up to you. 
 
I also added pineapple to the recipe. Normally, I love pineapple in sweet and sour chicken so of course, I thought it could only make this better.  Wrong.  It wasn't bad but for some reason, it didn't add to it. I almost didn't like the sauce with the pineapple. Weird, huh.
 
I absolutely loved this sweet and sour chicken and I know I'll be making it again. 


Sweet & Sour Chicken
Adapted from Finding Joy in My Kitchen

3 lbs. chicken, cut into bite sized chunks
1 1/2 cups cornstarch
2 eggs + 1 tbsp. water
2 tbsp. olive oil

3 1/2 cups sugar (I used splenda)
1 1/2 cups ketchup
3 cups cider vinegar
1/2 cup soy sauce
2 tbsp. minced garlic

2 red peppers
1 can (20 oz) pineapple chunks

If you're making as much as I did here, you'll want to use 2 pans to cook your chicken if you're able to. It will go much faster.  Heat 1 tbsp. per pan. 

Set up a bowl with the egg and water.  Set up another bowl with your cornstarch.  Dip the chicken into the egg, then the cornstarch.  Then drop it into the pan.  I made my daughter bread all the chicken first and then I cooked it.  Better her young fingers get messy than mine. 

As the chicken browns, put it into a 12 x 15 in. baking pan. If you aren't privileged enough to have one of these big pans, you can use 2 - 9 x 13 in. pans.  You're not cooking the chicken entirely, you're just trying to get a nice crust on it.

Combine the sugar (splenda), ketchup, vinegar, soy sauce and minced garlic into a big bowl.  I know this seems like a lot of sauce but you have a lot of chicken to coat plus you know you're going to want more sauce for the rice and veggies, right? 

When chicken is done browning, pour sauce over the chicken.  Stir and stick it into the oven for 1 hour at 350.  Stir like every 15 minutes.  After about 30 minutes, add your peppers and pineapple.  At this point you'll be so overcome by the amazing smell that you will want to taste a piece of chicken.  Go ahead, it's okay, I know it's amazing.


reade more... Résuméabuiyad

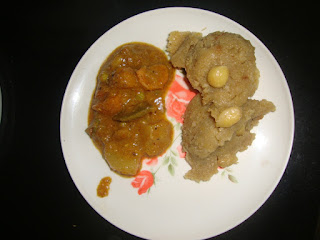
Recipe- Makki Di Roti & Palak Subzi

No, you read it right. We had Makki Di Roti & Palak Suzbi. I know the traditional combo is Makki di roti and Sarson ka saag, well, we don't get Sarson ka saag [the Mustard greens] in Chennai and so this alternative :)

When we had visited Delhi earlier this month, when i mentioned i like this combo, my aunt asked her maid to make it. Mom & I walked it down to this cool organic store called The Roots and bought Maize flour.We devoured the rotis and the Sarson ka saag, and mom decided she wanted to make them once we were back in Chennai. Since there was a packet of flour leftover, we brought it with us and yesterday mom made it for lunch.

She had asked the maid how to make [in her broken hindi] and managed to make a few small rotis, invited me over for lunch excitedly :)

What you need:
Maize Flour - 2 cups   

Salt -to taste
Ghee - as required to knead the dough

How to make:
1. Add salt and ghee to the flour and mix well till becomes a nice soft dough.
2. Make balls or divide the dough into portions
3. Take a plastic sheet and pat the dough on it, making it into a roti [dont make it too thin, it will stick to the sheet]... Alternatively you can roll out each ball between the folds of a greased plastic sheets.
4. Heat a tawa and cook the roti on it till both sides are done.
5. apply a dollop of butter or ghee and serve hot.


Palak Subzi that mom made was the usual subzi you make for rotis and it did go well with Makki di roti...

What you need:
Palak/spinach leaves - a bowl of chopped leaves
Onion- 1
Tomato- 1
Green chilli- 1[optional]
oil- as required
Salt- as required
Garam masala- 1 tsp
Cream/milk/curd- 1 tsp

How to make:
1. Boil the palak leaves with a dash of salt and make a puree
2. In a pan, add some oil and saute the onions & green chilli, once they turn golden brown, add the tomatoes and saute for a few more minutes.  [you can blend these if you wish]
3. To this add the spinach puree, salt, garam masala and allow it to cook
4. Add some cream/milk/curd just before you serve...

You can add palak to make it Palak paneer or potatoes if you desire. 

Bon Apettit!!
reade more... Résuméabuiyad

Thiruvathirai Special

Thiruvathirai, a star, also a festival celebrated in the marghazi masam [Dec-Jan] is a day when we celeberate the thandavam (cosmic dance) performed my Lord Shiva. Another side to this day is that it is Lord Shiva's star birthday today, the star being arudhra. The one thing i remember about Thiruvathirai is lunch menu, unfortunately it consists of items i dont like, well, these days i have a nibble and dont grunt as much. What is on the menu? Kali and Thalagam.. Sounds greek and latin, well, not really, but it is a wierd combination and mix of flavours.

We were in Delhi recently, and mom made Kali cos my uncle loves it and well, that was probably the 1st time i ate some on my own [with no one breathing down my neck] and actually liked it.. Hmm... so, today at lunch, i made myself some rotis and had a spoonful of kali as well :-) [Good girl i am]

Kali is a sweet dish, while Thalagam is a graavy made using 7/9/11/13/15 vegetables [something like a heavy duty sambar] 

How are these made? For the 1st time, i paid attention to mom and gramma when they explained the dishes. So, here goes..

Kali
What you need-
Raw Rice - 1 cup
Mung dal - 1 tbsp
Jaggery- 3/4 th cup
Butter-2 tbsp
Water - 2 to 3 cups
Coconut- 1 tbsp grated
Cashewnuts- fried in ghee
How to make Kali-
1. Wash and dry the rice 
2. Dry roast the rice and daal till the rice turns light golden.
3. Grind to a coarse powder or finely [depending on your preference]
4. In a kadai, add 2 cups of water to the jaggery and let it come to a boil. When it does, run it through a sieve to make sure there were no dust or foreign particles in the jaggery
5. To this liquid, add the rice - daal and coconut. Keep stirring and add water if you feel the mixture is too thick. Like Sooji upma, the rice will absorb the water, so dont worry if it looks runny. 
6. Stir for a good 15- 20mins till the rice cooks and starts releasing ghee around the corner. 
7. Sprinkle the fried cashewnuts and serve. 


Thalagam
What you need-
Vegetables of your choice- Today gramma used 15 veggies- Carrots, yellow pumpkin, beans, potato, sweet potato, arbi, butter beans, snake gourd, flat beans, string beans, brinjal, chow chow, raw banana and so many more.... [typically Indian veggies are used] - Chop them up into bite sized pieces.
Dry red chillies- 5 to 6 [depending on how spicy you like the dish] 
Toor dal - 1tbsp
Rice- 1/2tbsp
Coconut - 1/2 cup grated
Black Sesame seeds- 2tsp
Tamarind- the Size of a small lemon
Gingely oil- 2tsp
Mustard seeds- 1tsp
Salt- to taste
 
How to make the Thalagam-
1. Just like you make sambar, soak the tamarind in a cup of warm water for 5 - 10 minutes , squeeze and set aside the tamarind juice. 
2. In a pan, heat some oil, add the mustard seeds, allow to splutter and set aside. 
3. In the pan, add some more oil and add the toor daal, red chillies, rice, coconut and sesame seeds. Saute them till they all turn light brown colour and then grind to a fine powder. 
4. In the pressure cooker put all the chopped vegetables, tamarind juice, some salt and cook till they are tender. 
5. Now add the ground powder, and water if required. Mix and allow to cook well.  
 Note: The mix should not be too runny or light, it will be like a gravy/koottu. 
reade more... Résuméabuiyad

Sweet little things...

Para as meninas. As pequeninas coisas do quarto delas, nas cores vibrantes da infância. O menino Jesus de barro, que tanto adoram. 

Eu passo os dias a pensar em coisas bonitas. E vocês?


For the girls. Small treasures from their bedroom, in the vibrant colours of childhood. The small clay Jesus that they adore.

I spend my days thinking of pretty things. What about you?
reade more... Résuméabuiyad

Asparaus Quiche with a Sweet Potato Crust


 I'm not a big asparagus fan.  Saute it in butter and serve it the right way and it's okay but I rarely, if ever, buy it. It's just not my vegetable of choice. So why did I jump when I saw this recipe? 
 
Well, the sweet potato crust sounded amazing.  The herbs go so well with the sweet potatoes and it really was a perfect quiche crust. 
 
 Quiche. Now there's a word. I've always thought that sounds really fancy. Something that rich, hoity toity people make or you would only get in a fancy hotel for room service breakfast. Seriously, that is what I've always thought of the word quiche.  Never did I think that I would be making quiche.
 
 
 Anyways, back to the asparagus. It's not really asparagus season so I bought frozen. (actually, I have no idea when it's in season, I just couldn't find any fresh at the store.)  I thought about subbing green beans or broccoli but I thought that I could be a big girl and try the asparagus. 
 
Well, it was delicious.  I loved it. Quiche. Asparagus Quiche. Me?  Can you believe it?


Asparagus Quiche with a Savory Sweet Potato Crust
Adapted from Life As a Plate

For the crust:
1 lb. cooked sweet potatoes
2 large eggs, beaten
1 tsp. garlic powder
1 tsp. onion powder
1/2 tsp. dried rosemary
1/2 tsp. dried thyme
1/4 tsp. salt
1/8 tsp. pepper
1/3 cup parmesan cheese, shredded

For the filling:
1 small onion, chopped
1 9oz. pkg frozen asparagus
1 1/2 tsp fresh garlic
1/4 tsp. salt
2 tbsp. butter
10 eggs, beaten
1/4 cup milk

For the crust, mix all the ingredients in a large bowl and then press into the bottom of a greased 8 x 8 in. pan.  Bake at 375 for 20 - 25 minutes until the center is firm. 

For the filling, melt the butter in a saucepan and add the onions, asparagus and garlic.  Cook for 5 - 10 minutes until onions are slightly transparent.  Let cool for 5 - 10 minutes while crust finishes cooking.

Beat eggs and milk until fluffy in a large bow.  Add in the asparagus mixture to the eggs, stir and then pour into pan on top of sweet potato crust.  Bake for about 30 - 35 minutes until cooked through.  Center will be firm and the edges slightly brown.  It might take a bit longer to cook so keep an eye on it.


This is linked with:
My Meatless Monday at My Sweet and Savory


Tweet
reade more... Résuméabuiyad

Boxing Day

I had a delightfully quiet Christmas Day yesterday, shared only with my immediate family.  However, Boxing Day has been full of activity, due to a very welcome visit from my brother and his family, who live in Sweden.

Today we re-celebrated Christmas, with cold ham and turkey, a vegetable flan, two kinds of salad, hot Christmas pudding with brandy custard, strawberry pavlova, home-made vanilla ice cream and fruit mince pies.

We ate outdoors in beautiful sunshine then collapsed in front of the Boxing Day test on the telly.  The more energetic family members played table tennis (a Christmas present from Grandad) and Pictionary.

Living so far from my siblings (one in Sweden and one in Sydney), I value greatly any time spent with them.

The whole crowd
The girls: my daughter, sister-in law, three beautiful nieces and me

reade more... Résuméabuiyad

Fruitcake Journey


The journey is complete!  The fruitcake journey. Remember almost 2 months ago when I started the Fruitcake Starter?  A bunch of fruit, sugar and brandy, sitting on my counter making a delicious tasting fruit starter.


I patiently let it sit on my counter.  I think the highlight of my day was stirring it. It really smelled good!!


The first fruit making the starter gets used for some other purpose.  It's the juice that you need from that first step. 
 
I tried to take Veronica's advice and make jam with that first fruit.  I needed instant pectin which I had never used.  I didn't read the box or really even think about it.  Instant pectin, how hard could it be? 
 
I threw the fruit, sugar, cinnamon and instant pectin together like she said and it didn't resemble jam at all.  AT ALL.  Then the few brain cells clicked together and I realized that I needed to cook the pectin first with water.  I realize now what an incredible idiot I was and quickly threw the whole glop away before anyone knew what did. 
 
Veronica, stop laughing. 


Ok, back to the fruitcake. After you get your starter liquid, it's time to soak the fruit that you will be using for the fruitcake.   Stirring this daily is harder because not only does it smell really, really good, but it tasted awesome! I couldn't help dipping in early every once in awhile to taste the fruity goodness!  I'm not really a patient person.
 
It was an exciting day when I finally could drain it and make the fruitcake!  Notice how I did remember to keep the liquid as I drained it?  That is the stuff to start your next fruitcake.  Start it, share it, keep it, freeze it, whatever. 


Veronica has 2 recipes for this fruitcake on her blog.  She has the cream cheese scratch version and the cake batter easy version.  She recommended halving each recipe and making both.  So I did. 
 
We got mixed opinions as to which was better.  The kids and my brother liked the cake batter cake better. It was sweeter than the scratch version and quite tasty.  My friends and I preferred the scratch version.  Veronica described it like it was more the kind of cake that you would like to eat with coffee in the morning.  That really is the best way to describe it.  They were both good but I enjoyed the scratch version better.  I ate way too much of it by the way. 


Last year I made a gluten free fruitcake that was delicious.  This years fruitcake is not gluten free but I do intend on trying to make a gluten free version next.  Fruitcake is NOT just for the holidays. How awesome would it be to have a fruitcake at your next summer picnic!   So I suggest you get the brandy out of the cupboard and get the starter going. 


Friendship Fruit Cake
Recipe from Veronica's Cornucopia
This fruit cake takes a month to make, so plan ahead! The starter must be used or frozen within three days of receiving. Keep it frozen until you’re ready to use it.

Day 1
In a large glass bowl, combine:

  • 1 pint friendship fruit starter
  • 1 (16 oz) can sliced peaches with juice, each slice cut into 4 pieces
  • 2 ½ cups granulated sugar
Stir every day for ten days. When not stirring mixture, keep it covered with a splatter guard, paper towel, foil, or a loose lid. Let sit at room temperature. Do not refrigerate it or cover it airtight. A pan of water underneath the jar or bowl will keep the ants out, but I had no problem with bugs since I made mine in the winter.

Day 10
Add:

  • 1 (16 oz) can chunk pineapple with juice, each chunk cut in half
  • ½ cup granulated sugar
Stir every day for ten days.

Day 20
Add:

  • 2 (10 oz) jars maraschino cherries, drained, and each cherry cut in half
  • 2 ½ cups granulated sugar
Stir every day for the final ten days.

Day 30
Drain fruit and reserve it and the liquid. Pour the liquid into three glass pint jars. Save one for yourself for your next fruit cake, and give two to friends, along with a copy of this recipe. Cake must be started within 3 days after receiving the starter or you should freeze the starter to use at a later date. Do not use plastic or metal containers to store liquid.


**If you're like me and don't have glass jars laying around, use small applesauce jars.  They worked perfectly.  Not the big ones that you usually get but they have this smaller size which is too small if you eat a lot of applesauce but perfect if you just want to jar.  :-)


~To make the cake~
Easy version
2 (18.25 oz) yellow or butter recipe golden cake mixes
2 (3.5 oz) boxes instant vanilla pudding mix
1 1/3 cups vegetable oil
8 eggs
2 cups raisins (golden or regular, or a combination)
2 cups chopped nuts
2 cups sweetened, shredded coconut
Reserved fruit

Preheat oven to 325 degrees F. Grease and flour two 12-cup Bundt pans or four large loaf pans. In a very large bowl, combine cake mix, pudding mix, oil and eggs. Stir in the raisins, nuts and coconut, and the reserved fruit from the starter. Stir until all ingredients are well combined. The batter will be stiff. Spread batter into the prepared cake pans. Bake for 60-75 minutes, or until toothpick inserted in center comes out clean. Sit on wire racks and wait ten minutes before turning them out onto the racks to cool completely. I spray my cakes thoroughly with water while cooling to help make them more moist—the water absorbs and does not change the flavor. Store in an airtight container or wrap in plastic wrap. Serve at room temperature.

Cream Cheese Version
5 cups all-purpose flour
4 teaspoons baking powder
2 teaspoons salt
1 cup (2 sticks) unsalted butter, room temperature
2 cups granulated sugar
2 (8 oz) packages cream cheese, room temperature
1 cup vegetable oil
8 eggs, room temperature
2 teaspoons vanilla extract
2 cups golden raisins
2 cups chopped nuts
2 cups sweetened, shredded coconut
Reserved fruit

Preheat the oven to 325°F. Grease and flour two 12-cup Bundt pans or 4 large loaf pans; set aside. In a medium bowl, whisk together the flour, baking powder, and salt; set aside. In a separate large bowl, cream together the butter, cream cheese, and sugar. Beat in the oil. Beat in the eggs and vanilla extract until incorporated. Fold the dry ingredients into the wet ingredients; the batter will be thick. When barely any streaks remain, mix in the raisins, nuts and coconut, and the reserved fruit from the starter stirring well. Scrape batter into the prepared pans, smoothing the tops. Place the cakes in the oven and bake for 60-70 minutes, or until a tester comes out clean. Allow cake to cool in the pan for 10 minutes, then remove to a wire rack to finish cooling.


**I cut each of these recipes in half and made one bundt pan of each.  Be careful when you halve the recipe, it's easier if you write it out first.


reade more... Résuméabuiyad

The Best Christmas Present Ever

Look what the best husband in the world gave me for Christmas.

I have longed for a Kitchen Aid mixer for years, and especially since my old Sunbeam Mixmaster died last January, but I didn't ever think I would own one.

The mixer is a delight to use; I have already mixed bread dough and made a pavlova for our Boxing Day visitors.

I know many people don't like to get household appliances for Christmas, but for me this gift is a dream come true.
reade more... Résuméabuiyad

Merry Christmas!


Wishing you and your loved ones a safe, joyous and restful Christmas.
reade more... Résuméabuiyad

Once upon a time...

Era uma vez... uma menina muito pequenina! É assim que começam as histórias que invento para distrair a Conchinha. Têm sempre uma lição de moral subjacente, em que a menina pequenina aprende que não deve fazer birras, que deve obedecer à mãe, enfim, o habitual! :)

Foi a contar uma dessas histórias que tirei mais umas fotos à nossa mesa de Natal. Cor-de-rosa como os contos infantis.


Once upon a time... there was a little, little girl! That's how I always start the stories that I make up for Conchinha. Always with high morals, the stories tell her how to behave, to obey her mother, well, the usual messages for children!.. :)

I was telling her one of these stories when I took some more photos of our Christmas table. Pink as in the fairy tales...
reade more... Résuméabuiyad

Merry Christmas!

E aquele dia maravilhoso do ano chegou... Eu desejo-vos um excelente Natal, com muito amor e saúde, junto daqueles que vos são próximos. Abracem-nos, aproveitem os momentos juntos, que tudo passa a correr... Há um ano atrás, estive com a minha mãe pela última vez. Por isso, este dia tem um significado duplamente especial para mim. Aproveitem, divirtam-se, riam, beijem, abracem-se. É Natal!

Um beijo enorme a todos.


And the glorious day arrived... I wish you a Merry Christmas, full of love and health, surrounded by your loved ones. Hug them, enjoy this day together, as time flies... A year ago, I saw my mother for the last time. So this date has a double special meaning to me. Enjoy, kiss, laugh, hug, have fun! It's Christmas!

A big kiss to you all.

reade more... Résuméabuiyad

A floral Christmas table

Para quem gosta de flores, de detalhes vintage e do Natal...


For those who like flowers, vintage details and Christmas...

reade more... Résuméabuiyad